Foggy day
[Flutter] Text Widget - 사용법 본문
Text Widget을 살펴보니 자주 사용하지는 않지만 잘 활용하면 도움이 될만한 특성들이 많았습니다. 그래서 이번 포스팅에서는 Text 위젯에 대해 상세히 알아보겠습니다. 그림으로 이해하는 것이 필요한 특성들은 이미지와 함께 따로 설명하고 있으며, 그 외의 특성들은 코드에 주석으로 달아놨습니다.
1. TextStyle
여러 가지 텍스트 스타일을 적용해 봤습니다.
자세히 설명하지는 않고, 코드와 주석으로 대체하겠습니다. full code는 페이지 하단에 있습니다.
TextStyle(
    fontSize: 20,
    height: 2,
    color: Colors.green,
    fontWeight: FontWeight.bold,
    backgroundColor: Colors.orange.shade50,

    /// 자간
    letterSpacing: 1,

    /// 그림자 효과
    shadows: const [
      Shadow(
        color: Colors.grey,
        offset: Offset(5, 5),
        blurRadius: 5,
      ),
    ],

    /// 밑줄의 스타일
    decorationStyle: TextDecorationStyle.wavy,

    /// 밑줄의 두께
    decorationThickness: 2,

    /// 밑줄의 형태, underline(아래), overline(위),  lineThrough(중간),
    decoration: TextDecoration.lineThrough,

    /// 밑줄의 컬러
    decorationColor: Colors.red,
  )
2. overflow, softWrap
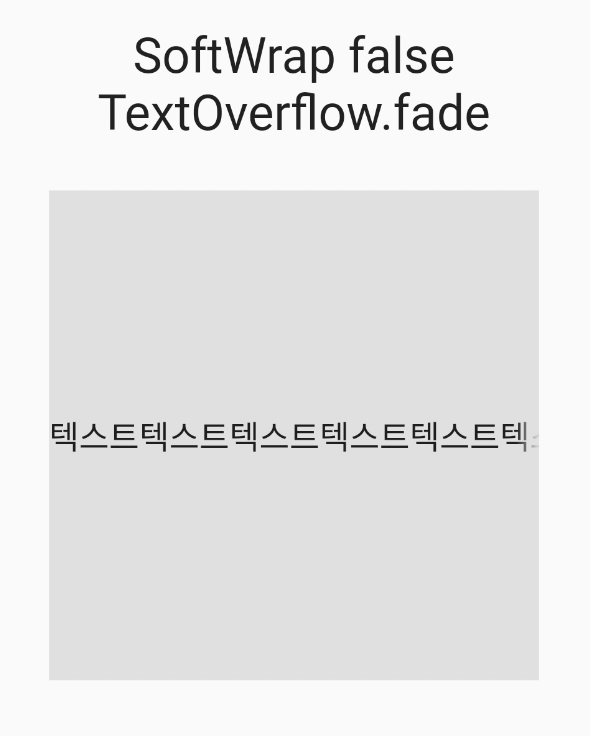
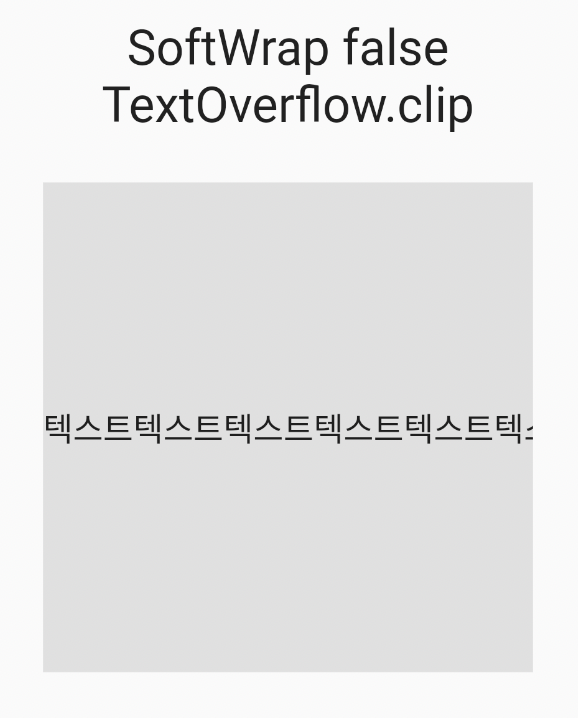
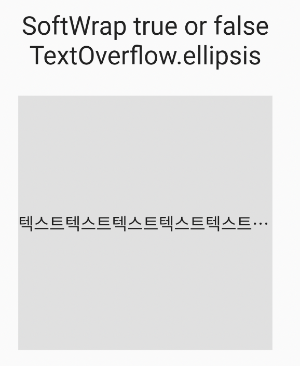
overflow특성은 softWrap특성과 관련이 있습니다. softWrap이 true인지 false인지에 따라서 overflow특성이 적용될지 말지가 결정되는 경우가 있습니다.
TextOverflow에는 4가지 타입이 있습니다.
- visible : 텍스트가 길어지면 컨테이너 외부까지도 글자를 렌더링 합니다.
- fade : overflow(글자가 container/영역을 초과하는 경우)되면 끝부분 글자가 흐리게(fade) 처리됩니다.
- ellipsis : overflow가 되는 지점에서 말줄임(...) 텍스트가 렌더링 됩니다.
- clip : overflow되는 지점에서 글자가 잘려 보입니다.
만약 softwrap이 true이거나 null이라면 ellipsis만 적용됩니다. 다른 특성들은 softwrap이 false일 때만 적용됩니다. ellipsis는 false에서도 적용됩니다.

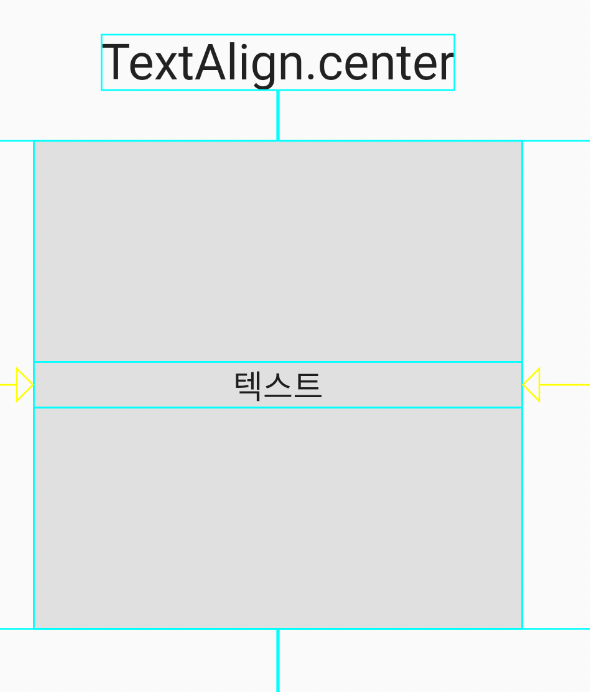
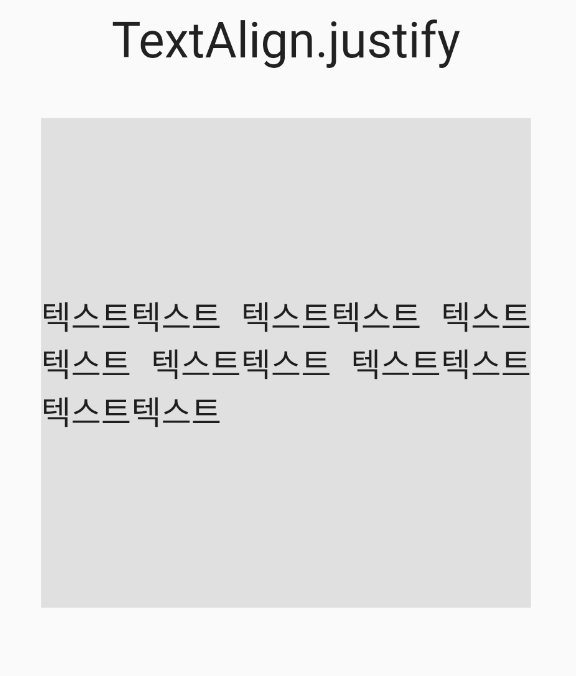
3. TextAlign
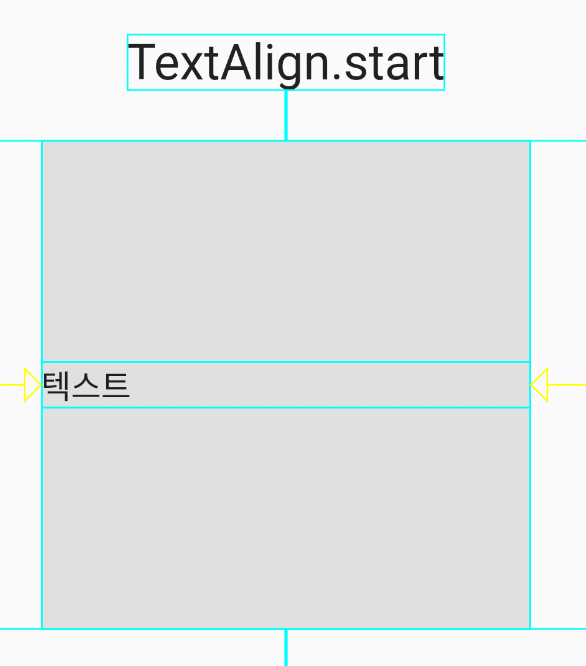
텍스트 위젯 내에서 텍시트를 어떻게 정렬시킬지를 결정합니다.
- start, left : 왼쪽
- center : 가운데
- end, right : 오른쪽
- justify : 줄 바꿈 처리를 글자에 맞게 부드럽게 해 줍니다.

4. TextHeightBehavior
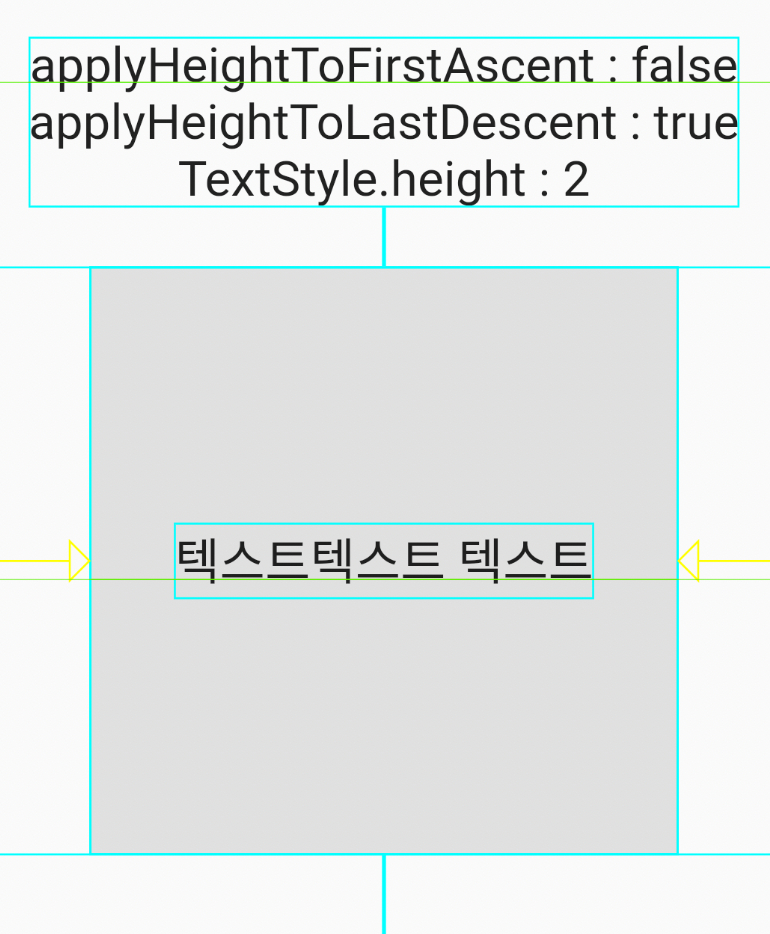
textHeightBehavior 특성은 TextStyle의 height와 관련이 있습니다. TextStyle.height는 텍스트 영역의 높이를 변경시키는 역할을 합니다. height를 변경하면 텍스트의 위와 아래 영역이 변경되는데 textHeightBehavior을 사용하면 한쪽 영역의 변경을 허용할지 말지를 설정할 수 있습니다.
applyHeightToFirstAscent와 applyHeightToLastDescent가 둘 다 true면(기본값 true) hegith 값이 정상적으로 적용됩니다.
applyHeightToFirstAscent가 false면 텍스트의 위쪽 영역에는 height값이 적용되지 않습니다.
applyHeightToLastDescent가 false면 텍스트의 아래쪽 영역에는 height값이 적용되지 않습니다.


5. TextWidthBasis
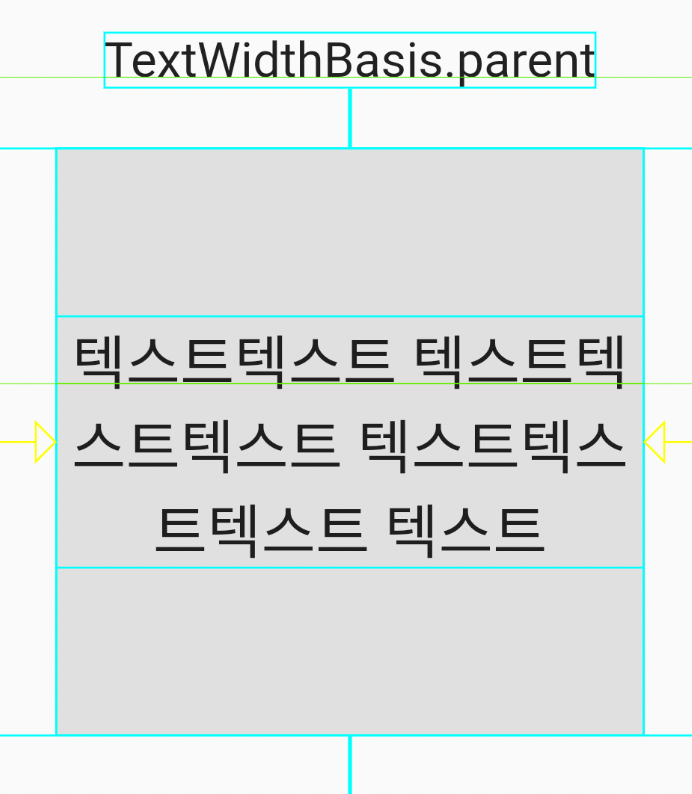
TextWidthBasis 특성은 Text Widget의 가로넓이를 결정하는 데 사용됩니다.
- TextWidthBasis.parent(기본) : 텍스트의 길이가 한 줄을 넘어간다면, 텍스트 위젯은 부모 위젯의 가로넓이와 동일합니다.
- TextWidthBasis.longestLine : 텍스트의 길이가 한 줄을 넘어간다면, 텍스트의 라인 중 가장 긴 라인의 사이즈가 텍스트 위젯의 가로넓이가 됩니다.
아래 사진을 보면 longestLine의 경우 가장자리에 약간의 공백이 생겼지만 parent는 공백이 없습니다.
거의 사용하지 않을 것 같은 특성입니다.

Full code
import 'package:flutter/material.dart';

class TextScreen extends StatefulWidget {
  const TextScreen({Key? key}) : super(key: key);

  @override
  State<TextScreen> createState() => _TextScreenState();
}

class _TextScreenState extends State<TextScreen> {
  @override
  Widget build(BuildContext context) {
    return Scaffold(
      appBar: AppBar(
        title: const Text("TextScreen"),
      ),
      body: Column(
        mainAxisAlignment: MainAxisAlignment.center,
        children: [
          const Text(
            "TextStyle",
            style: TextStyle(fontSize: 25),
            textAlign: TextAlign.center,
          ),
          const SizedBox(height: 30),
          _body(),
          const SizedBox(height: 60),
        ],
      ),
    );
  }

  Widget _body() {
    return Center(
      child: Container(
        color: Colors.grey.shade300,
        width: 300,
        height: 300,
        child: Column(
          mainAxisAlignment: MainAxisAlignment.center,
          children:  [
            Text(
              "텍스트텍스트 텍스트텍스트텍스트 텍스트텍스트텍스트 텍스트",
              style: TextStyle(
                fontSize: 20,
                height: 2,
                color: Colors.green,
                fontWeight: FontWeight.bold,
                backgroundColor: Colors.orange.shade50,

                /// 자간
                letterSpacing: 1,

                /// 그림자 효과
                shadows: const [
                  Shadow(
                    color: Colors.grey,
                    offset: Offset(5, 5),
                    blurRadius: 5,
                  ),
                ],

                /// 밑줄의 스타일
                decorationStyle: TextDecorationStyle.wavy,

                /// 밑줄의 두께
                decorationThickness: 2,

                /// 밑줄의 형태, underline(아래), overline(위),  lineThrough(중간),
                decoration: TextDecoration.lineThrough,

                /// 밑줄의 컬러
                decorationColor: Colors.red,
              ),

              /// 텍스트 크기의 비율입니다.
              /// 1.5 -> 지정된 크기보다 50% 커짐
              textScaleFactor: 1,

              /// 텍스트 위젯의 가로 넓이를 결정해줍니다.
              /// 텍스트의 길이가 한 줄을 넘어가고 TextWidthBasis.parent 타입 이라면
              /// 부모 위젯의 가로 넓이 크기와 동일합니다.
              /// 텍스트의 길이가 한 줄을 넘어가고 TextWidthBasis.longestLine 라면
              /// 텍스트의 라인 중 가장 긴 라인의 사이즈가 텍스트 위젯의 가로 넓이가 됩니다.
              textWidthBasis: TextWidthBasis.parent,

              /// leadingDistribution = Does not affect layout when [TextStyle.height] is not specified.
              textHeightBehavior: const TextHeightBehavior(
                  // applyHeightToFirstAscent:false,
                  // applyHeightToLastDescent: false,
                  ),

              textAlign: TextAlign.center,

              /// selectionColor 기능은 작동하지 않습니다.
              /// Text는 드래그/글자선택이 불가능합니다.
              /// 드래그를 위해서는 SelectableText 위젯을 사용해야 합니다.
              selectionColor: Colors.blue,

              /// StrutStyle에 관해서는 설명하기 어려운 부분들이 있어서
              /// 추후에 기회가 되면 다시 다뤄볼 예정입니다.
              /// 글자의 영역을 조절하는데 사용되는 특성입니다.
              // strutStyle: StrutStyle(fontSize: 30, leading: 0.5),

              /// maxLines 특성은 몇줄까지 사용 가능한지를 정의합니다.
              /// 설정한 라인을 넘어가면 텍스트가 짤립니다.
              maxLines: 3,

              softWrap: true,
              //
              overflow: TextOverflow.ellipsis,

              /// locale 특성은 거의 사용하지 않습니다.
              /// 공식 문서에서도 거의 사용하지 않는다고 설명하고 이씃ㅂ니다.
              locale: null,
            ),
          ],
        ),
      ),
    );
  }
}
'Flutter > Flutter widget' 카테고리의 다른 글
| [Flutter] SingleChildScrollView - 사용법 (0) | 2023.03.22 |
|---|---|
| [Flutter] Image Widget - 사용법 (0) | 2023.03.22 |
| [Flutter] PopupMenuButton - 사용법 (0) | 2023.03.21 |
| [Flutter] Row - 사용법 (0) | 2023.03.20 |
| [Flutter] Column - 사용법 (0) | 2023.03.19 |


